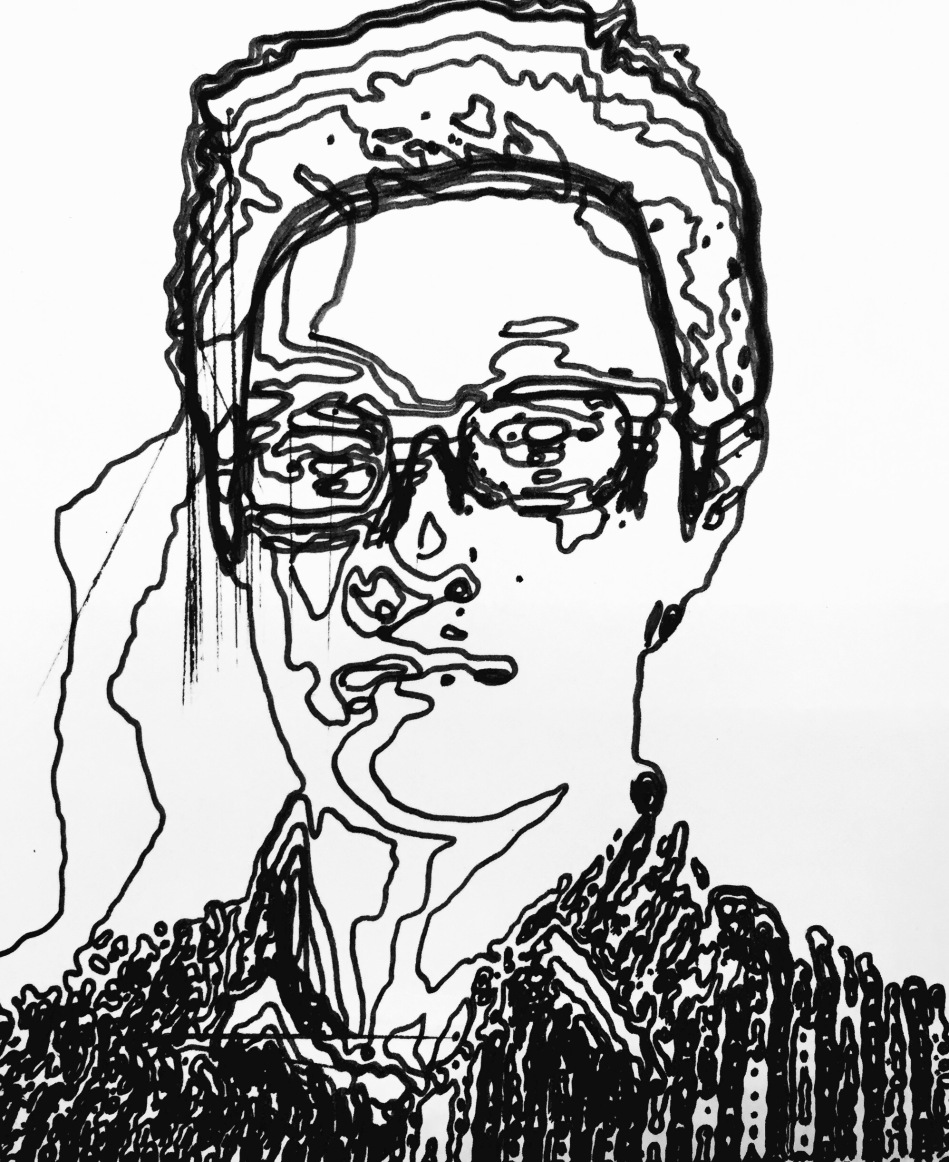
Latest 3D print


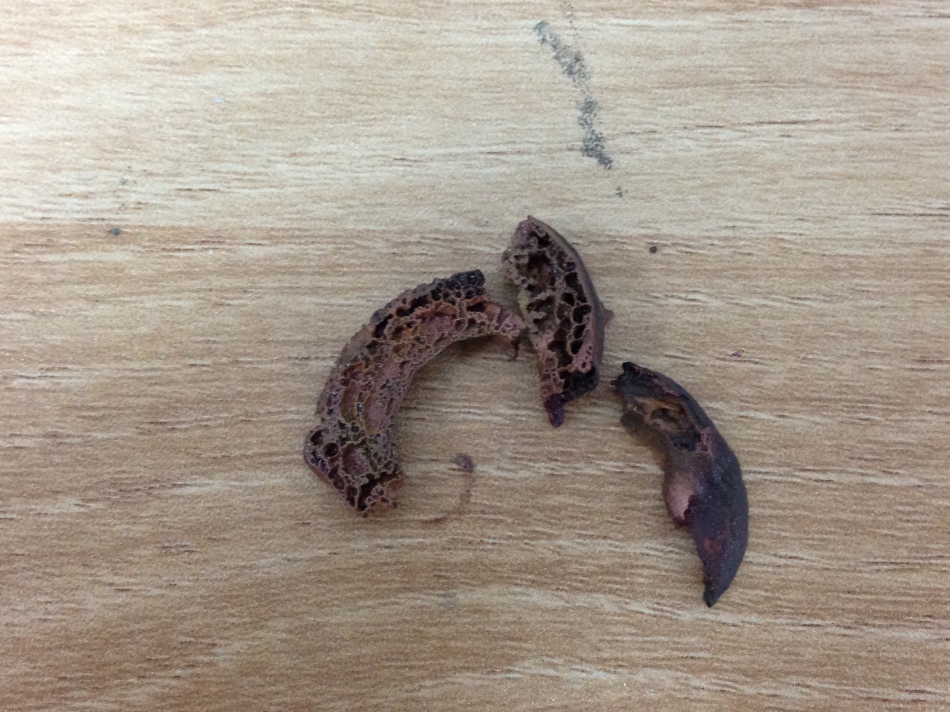
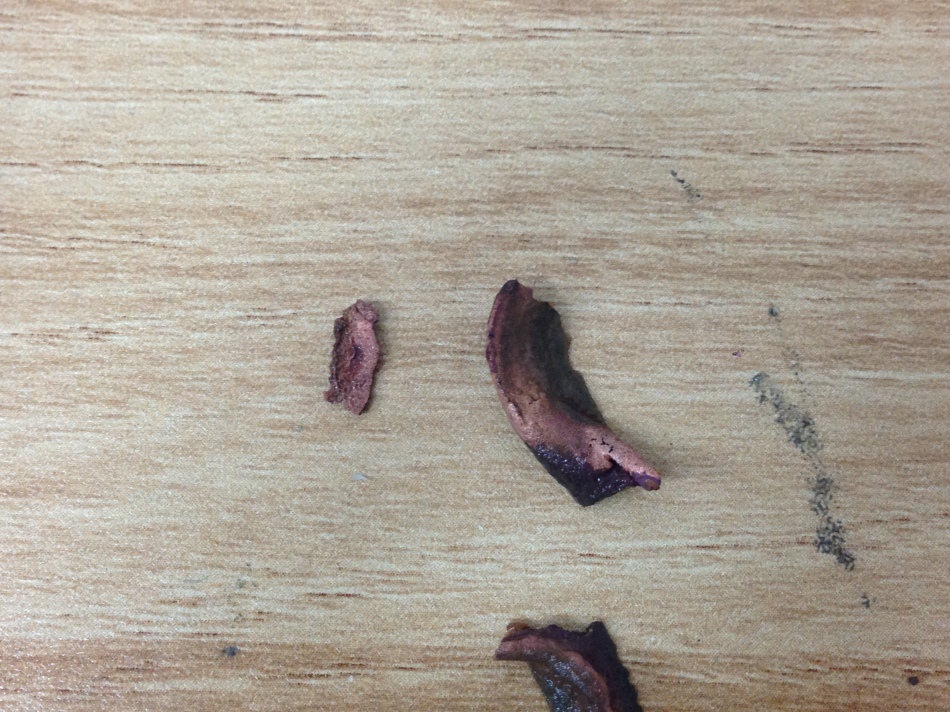
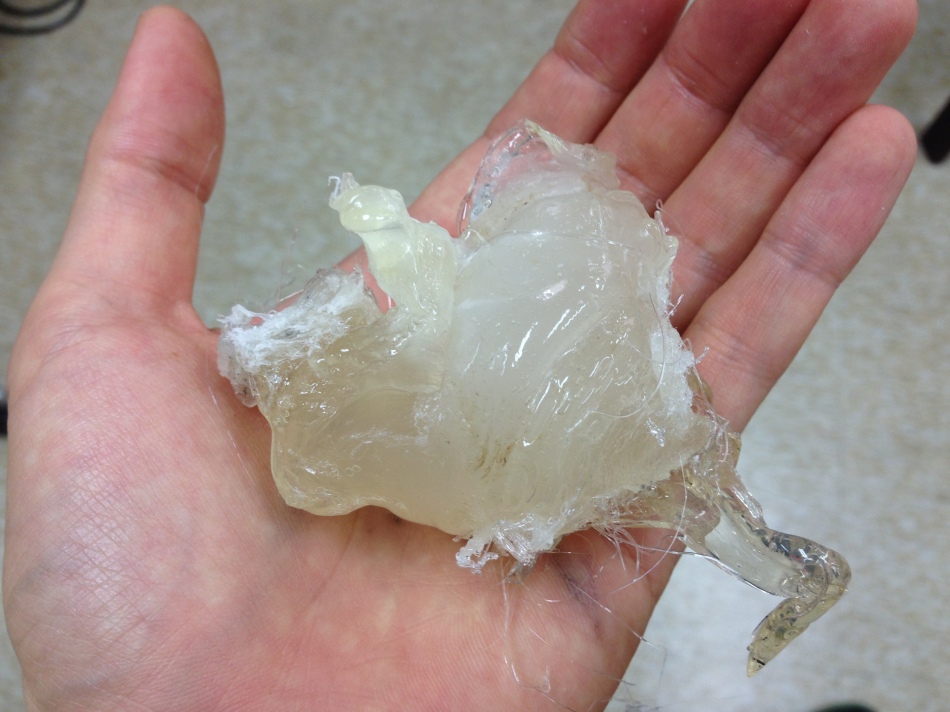
Have you tried Geoduck?
Form1(+) heated chamber
Since my form1 got refurbished to form1+ ish one, (it is recognized as form1+ when connected to a computer) things got busy and I did not have time to test print it.
Today, after months of working on other projects I finally have a chance to print something with it.
It gets rather cold in Seoul and my studio doesn’t have the best heating(if not at all). Form 2 has heated resin tank to keep the resin viscosity consistent. In cold weather resin gets thicker and doesn’t level quick enough after peeling process.
I briefly cleaned up the machine and added an old RepRap heater I had lying around, inside the orange chamber. Now the resin in the tank is warm and less viscous which hopefully, should improve print quality.
I used W1209 temperature controller I got from China long time ago and it seems to work pretty well so far.


Newer(and better) version of 2d gcode generator
I’ve been attending at Fablab Asia Network 2nd Conference in Taipei from this Monday, and today I gave a workshop on how to draw with any machine that takes gcode.
I am posting (per request) the revised version of 2d gcode generator for people to create their own drawings with their 3d printers.
Download below;
a Journey to micro FPV hexacopter (WIP)
I built a 3d printed micro octocopter more than 2 years back, when there isn’t really any brushed FC for more than a quad configuration. These days toy grade, quality multicopters came readily available, I decided to build one with more than 4 props.

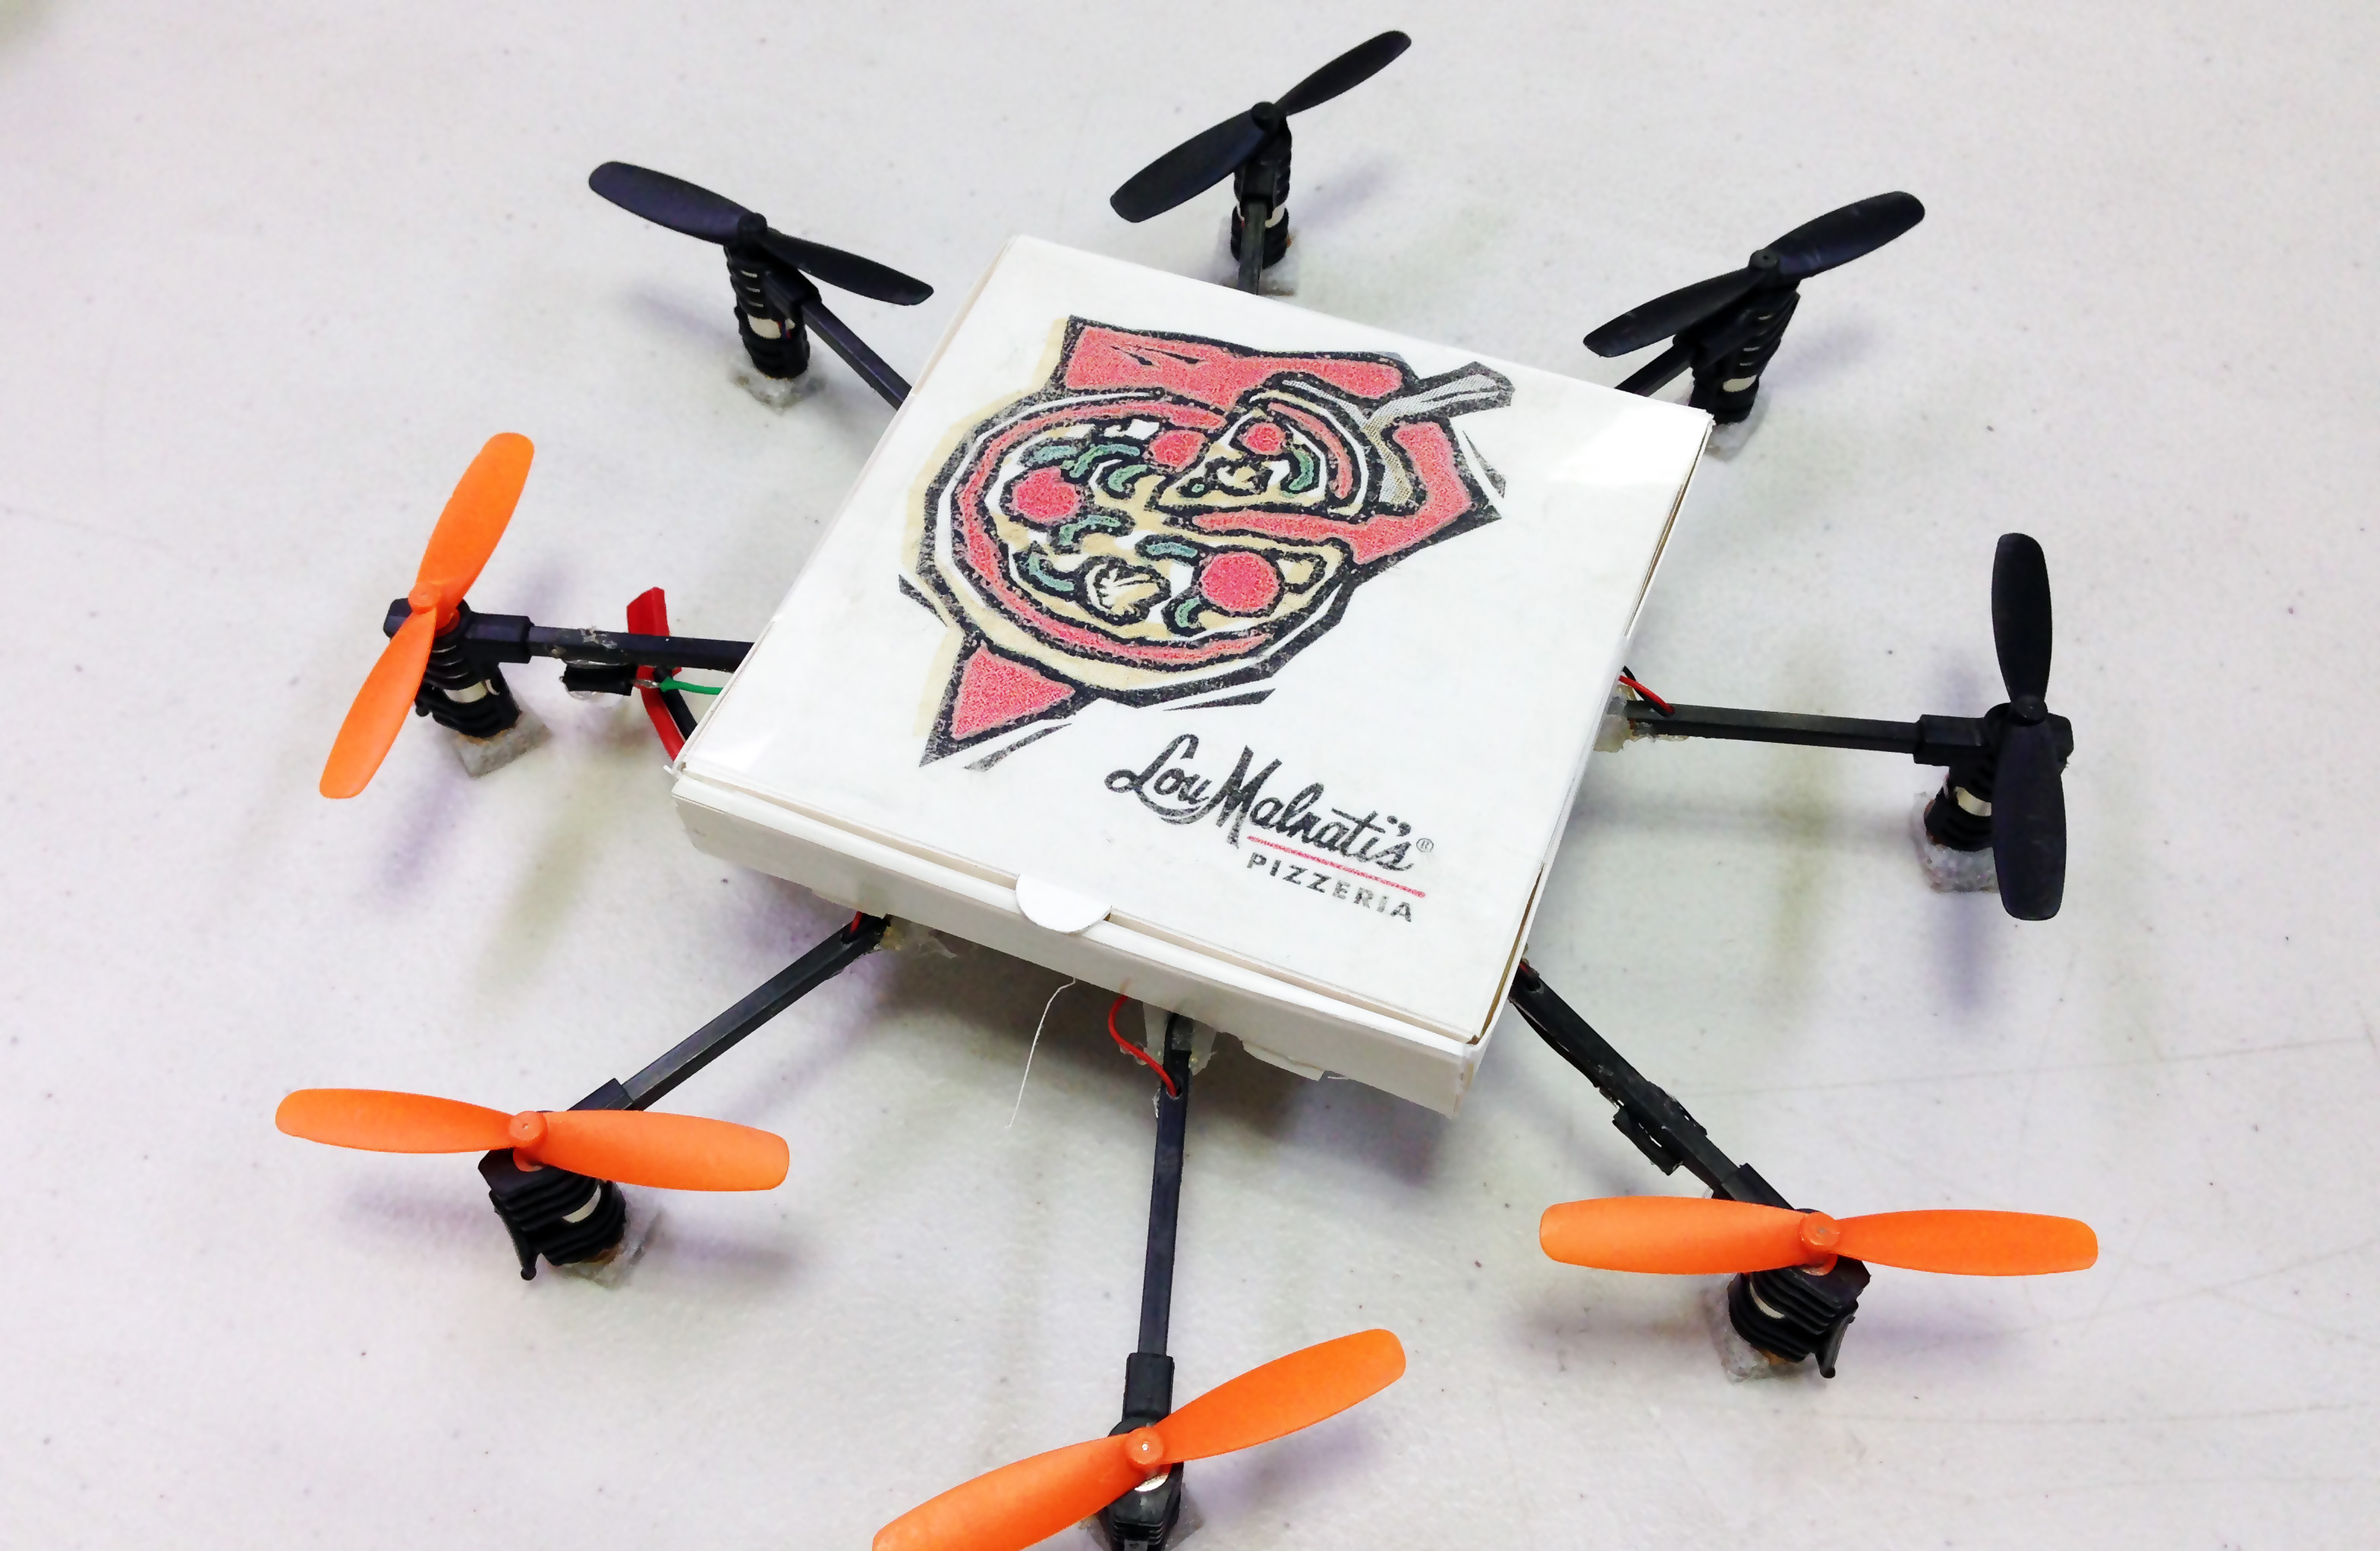
Recently bought a FC for Eachine X6, from banggood.com, with 3d printed polyamide frame(Taulman bridge) on my heavily modified Ultimaker(200W aluminum heated bed-capable of heating hotter than 150’C, fully enclosed passively heated chamber., dual fan, dual extruder, actively cooled stepper motors, larger power supply and etc). Polyamide is rather flexible thus it is unbreakable and will survive in numerous crashes.

I mixed using used and new motors and since they are brushed micro, used motors provide less power than the new ones causing drifting and yaw. New 7×20 motors and hubsan x4 props(proved most efficient) from banggood is on the way and I am hoping to get better lift and battery life.
Total weight with FPV gears but the battery weighs 53.9g.

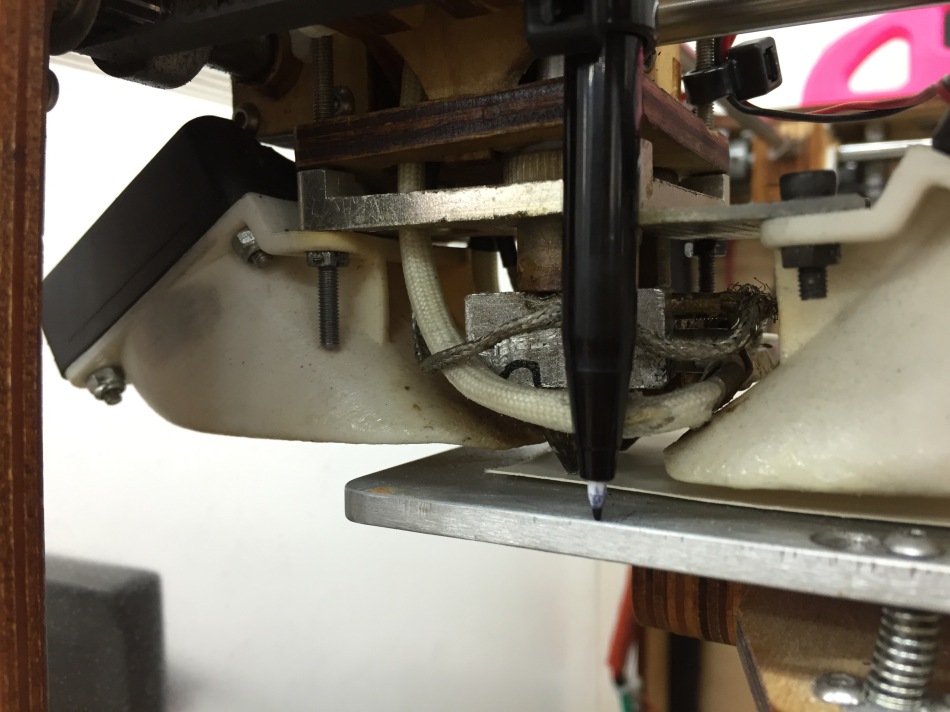
2D Gcode Generator
I am on a new project to create customizable inflatable structure, and I need to turn any kind of 2d curves into gcode.
This is a simple Grasshopper definition to turn any 2d geometries to gcode. There’s an issue with interpolating curves with points when numbers of points are too small to interpolate (or just random error in Grasshopper. It happens when computing rather large data.)
For sophisticated controls or get rid of errors I may revise but for now this would suffice to operate with simple 2d geometry.
에어 스트럭쳐를 만드는 새 프로젝트를 진행하기 위해 3D프린터를 개조하고 2D 커브를 G-code로 만드는 과정이 필요하다.
G-code생성은 여러가지 CAM프로그램을 사용할 수 있지만 Grasshopper를 사용하면 앞으로 이미지 처리라던지 이런저런 인풋 디바이스를 연결할 수 있는 확장성이 좋기 때문에 만들어 놓는 것이 좋을 것 같았다.
점들을 이어주는 과정(interpolate)에 문제가 좀 있는데 그래스호퍼 자체의 문제인듯 싶다.
데이터가 많아지면 한꺼번에 연산하는 과정에서 에러가 나는 경우가 종종 있기 때문에.. 추가적인 기능을 넣고 에러를 제거하려면 손을 좀 더 봐야겠지만 일단 이정도만 돼도 2d 지오메트리를 처리하는데 문제가 없다.
그래스호퍼 데피니션은 아래에서 다운받을 수 있다.
download 2D G-Code Generator


Beer + Making = Fun
I am a beer lover. A few bottles of hoppy beer is all it takes to make my day. When I came to Korea in 2010, there weren’t really anything to call craft beer culture other than a couple small breweries but nowadays there are handful of craft beer makers around the nation, one of those being the most eminent and probably the oldest, Magpie Brewery.
Recently I’ve contacted by their design team to produce their tap handles-I think it’s their first time to make one- and here’s the process of making a prototype. It is still a work in progress and may change over time.
Always wanted to try acetone vapor smoothing, and it worked pretty damn nice!
Simple woodworking + 3D printing + laser engraving
내가 좋아하는 술 종류를 꼽으라면 맥주가 단연 1위인데, 2010년말에 한국에 돌아왔을 때 크래프트비어 문화라고 부를만한 것이 거의 없었지만 요즘에는 몇 군데에서 hop이 많이 들어간 꽤 괜찮은 맛의 맥주를 만들어 판매하고 있다. 그 중 가장 유명한 곳인 맥파이 브루잉의 탭핸들(맥주를 따르는 부분 윗쪽의 장식겸 손잡이)의 시제품을 만드는 작업을 같이 하게 되었다. 아무래도 여러가지 재료를 가지고 뛰어난 퀄리티로 한꺼번에 생산해 주는 곳이 없다보니 이런 문의가 종종 들어온다.
ABS에 아세톤으로 처리하여 사출제품같이 매끈한 표면을 얻었다.


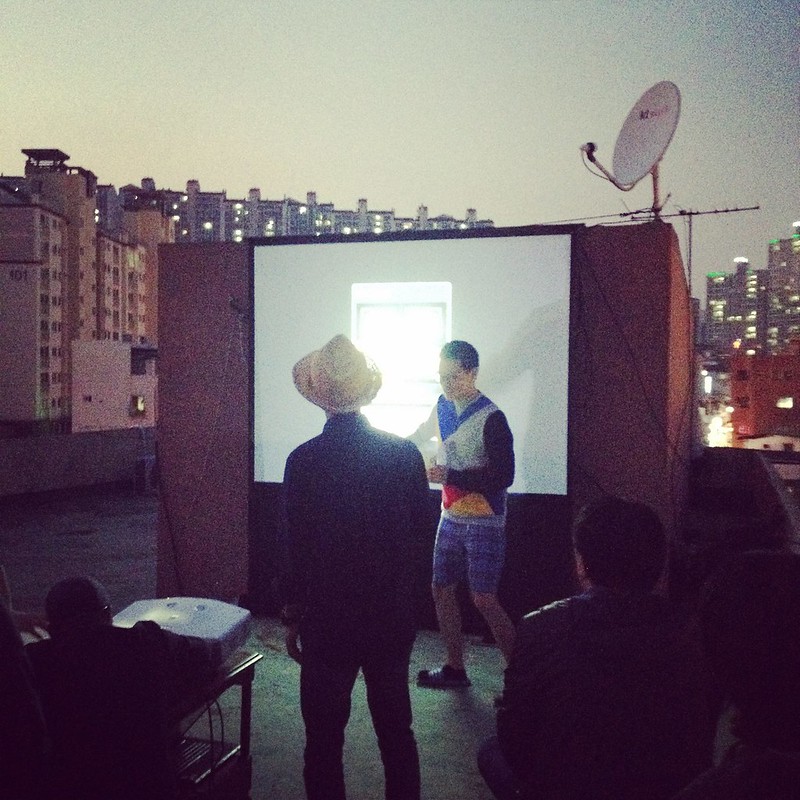
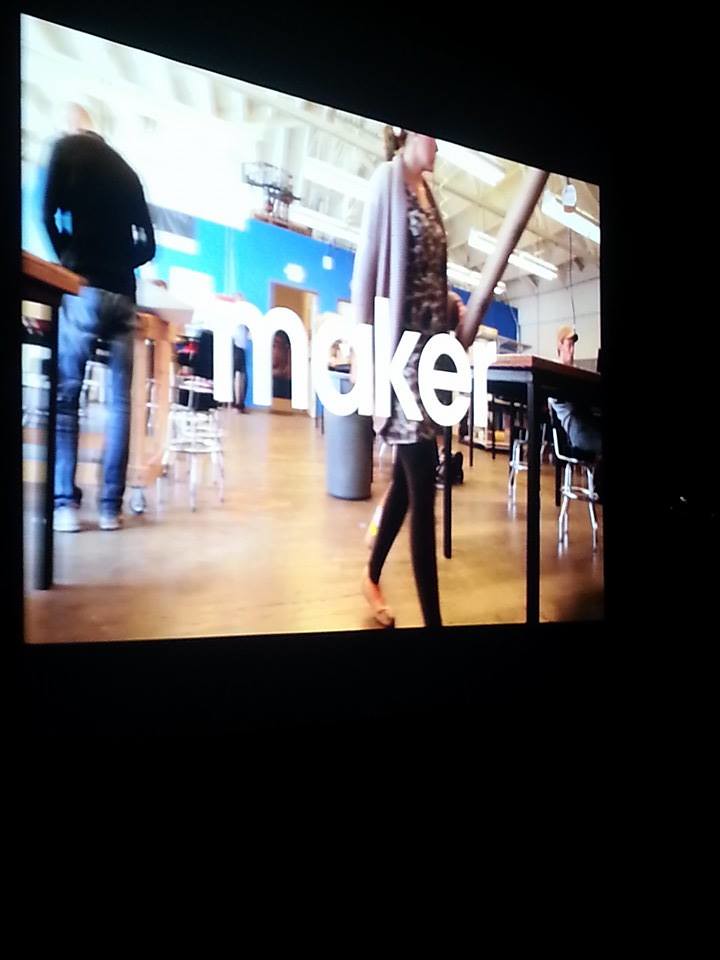
Maker Premier, Seoul, Korea
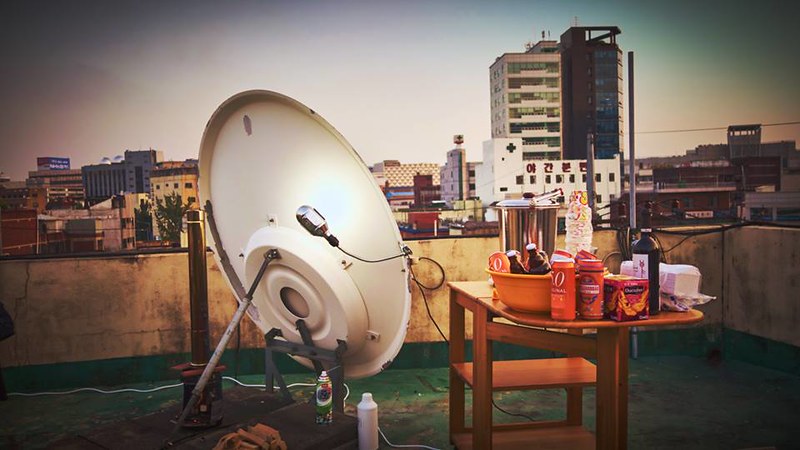
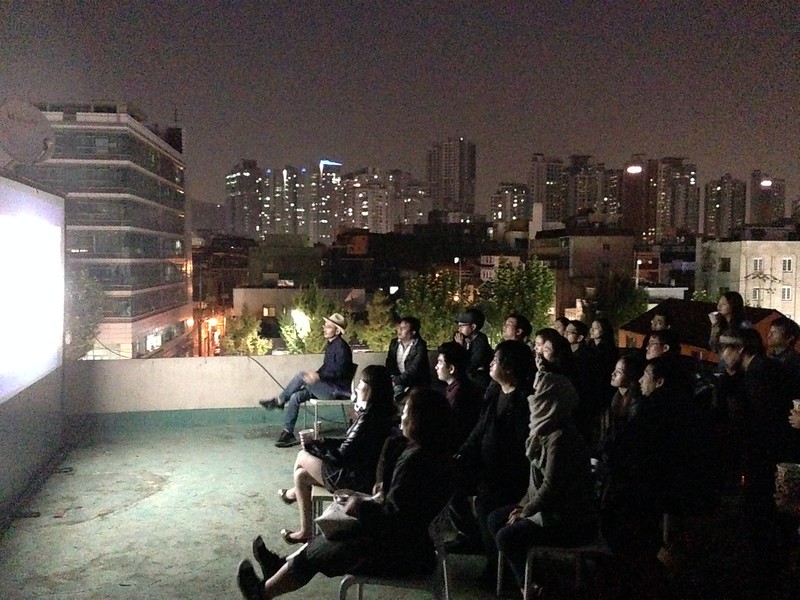
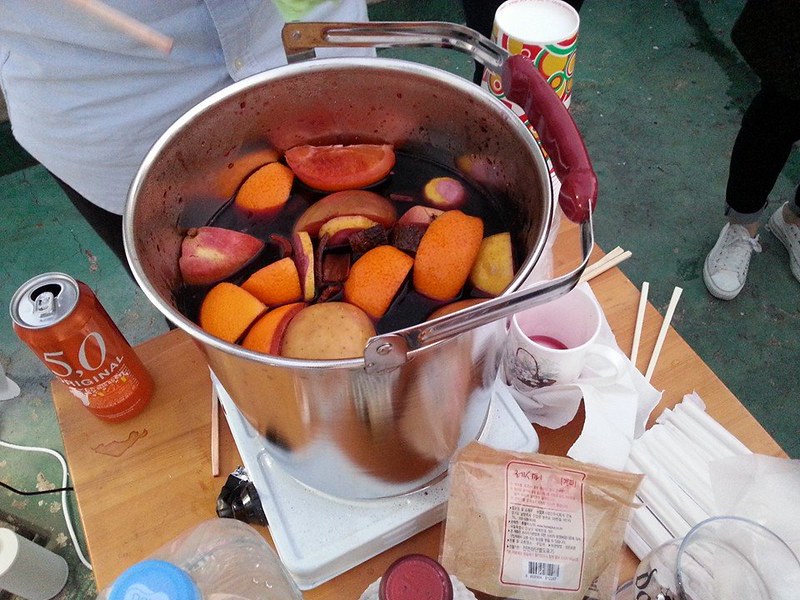
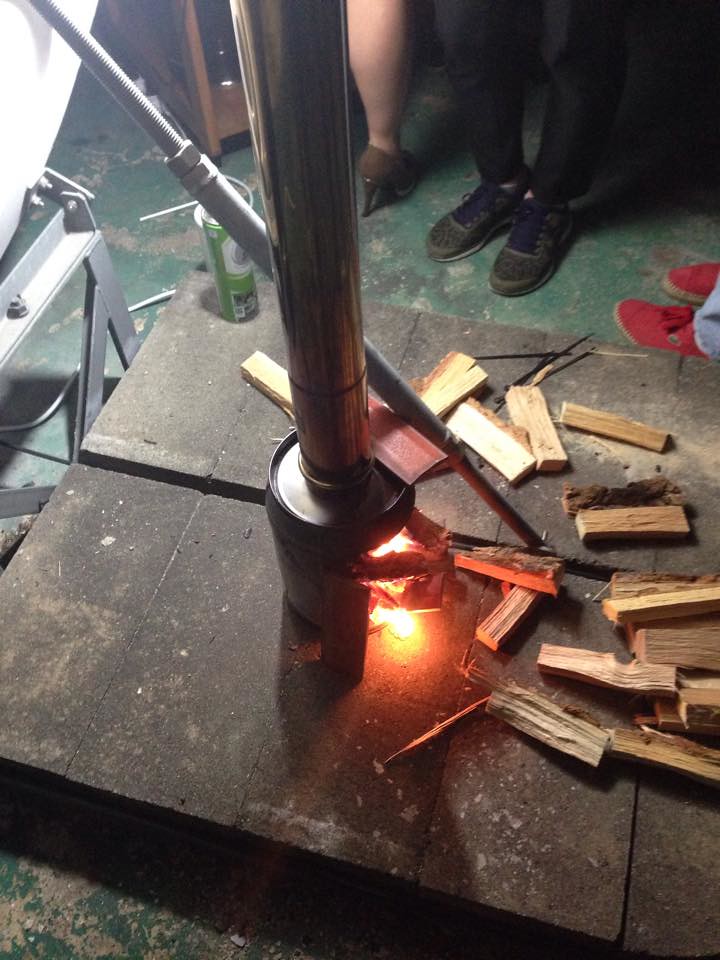
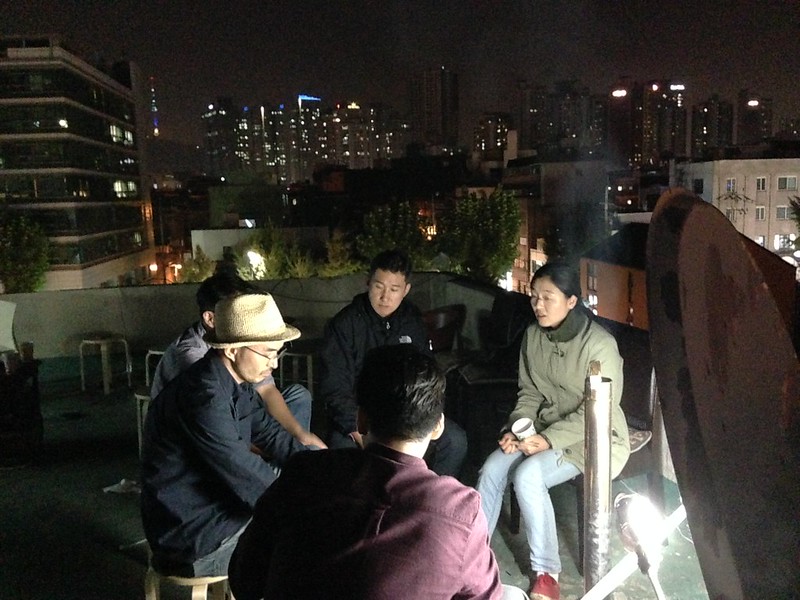
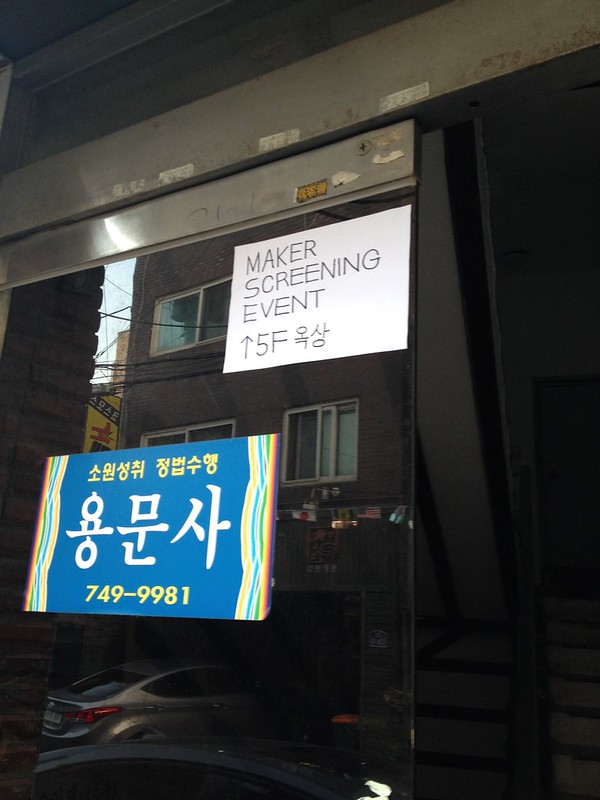
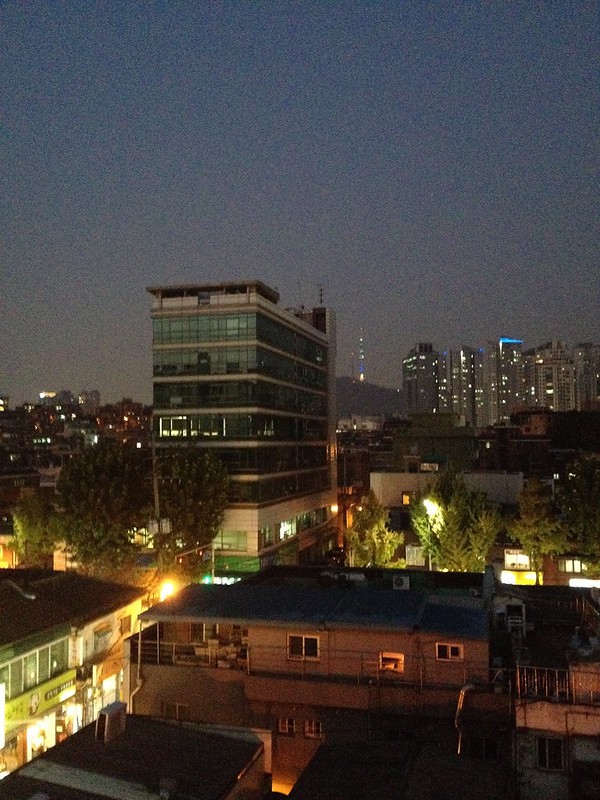
지난 10월 25일, 제가 번역한 Maker 다큐멘터리 스크리닝 행사를 국내에서는 처음으로 열었습니다. 용산에 있는 저의 작업실 옥상에 음식과 의자, 스크린과 프로젝터를 세팅했는데 저도 사실 옥상에서 뭘 잘 안하는지라 보이는 아름다운 서울의 풍경과 야경에 새삼 놀랐습니다. 오신 분들도 하나같이 풍경에 감탄을… 와중에 1층 방앗간에서 열심히 깨를 볶아 고소한 포그머신의 효과도 있었고 또한 재작년부터 만들고싶었던 하이네켄 난로를 만들 수 있어서 좋았습니다!
주요 메이커분들과, 정부와 기업의 메이커와 관련있는 분들을 초대하여 진행했는데 예상보다 많은 분들이 와서 몇몇 분들은 서서 관람을 하셔야 했습니다. 초대받은 분들이 거의 다 오신 경우는 저도 처음 봤어요.
여튼 정책을 결정하고 대규모 예산을 움직일 수 있는 분들이 제대로 된 정보를 접해야 한다는 공감대가 형성되었고 오셨던 정부와 기업 관계자 분들은 실제로 생각이 바뀐 분들이 있다고 하니 내년 정책에 살짝 기대를 해 봅니다. 협찬해주신 오픈크리에이터즈, 과천과학관, 한빛미디어에 감사드립니다.
더 많은 사진은 여기(flickr)에서 볼 수 있습니다.
Last Saturday I hosted the first ever screening of Maker documentary in Korea(I provided Korean translation and subtitles). It was held on the rooftop, a floor high from where my studio is at. I had many ideas to utilize the totally empty, relatively large rooftop space but this is the first and successful event/activity. Setting sun was beautiful and weather was warm. Surprisingly 40 something people were invited and actually most of them had come visited for this private screening event, and I only prepared about 20+ chairs so some of them had to stand or else for the whole event. Smell and the smoke of roasting sesame coming from the shop on the ground floor made kinda surreal atmosphere while watching the movie..
I finally had a good reason to build a mini keg fireplace.
Some people who has the power to decide where and how much to spend government and corporate fund were there to see what the maker movement is about and to meet with the makers. I can’t really tell exactly what’s gonna happen next year as where government funding goes to, but as we talked I kinda have a good feeling that it could possibly be much better than this year, which there wasn’t much support from the government and most of the related budget went to unrelated people and fields.
More photos and videos here.


Form 1 Bed Leveling
After spending a couple of months overseas, I needed to maintain the machines, I mean 3d printers, but I didn’t and it started spitting me with bad prints. One side comes out nice and clean but the other side has thin base and holes on the model due to unsuccessful support. FFF machines are rough and tough and easily hackable but SLA consists of optics and a galvanometer thus requires much more meticulous care.
두 달간 미국에 있으며 한국의 기계들을 정비하지 못해 Form1의 출력 퀄리티가 현저하게 낮아졌다. 한쪽은 베이스도 얇고 서포트도 제대로 생성되지 않아 모델에 구멍숑숑이다. FFF 프린터가 마구마구 사용하기에는 정말 적합한 것 같다. 아무래도 SLA는 광학부나 갈바노미터가 들어가 있다보니 조심조심 신경써서 관리 해 줘야 하는 부분이 있다.


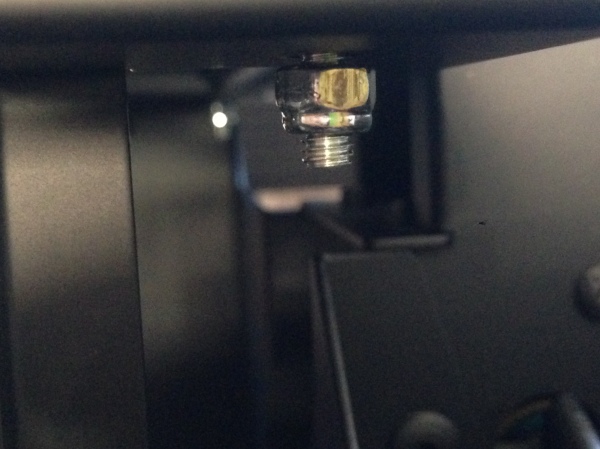
I disassembled the top part of the chassis including the orange cover by unscrewing bolts, Stainless steel bolts came out effortlessly but black bolts seem to stuck to the inner structure. I assume the structure may have powder coated after assembled or it was assembled before the coat wasn’t fully cured. Anyhow I sharpened the allen key to make sure to have the most torque on the bolt head.
볼트를 풀어 오렌지 커버를 포함한 채시 윗부분을 제거했다. 스텐 접시머리볼트는 부드럽게 잘 나오는 데 반해 검은 볼트는 분리가 거의 불가능 했다. 아마 조립 후 분체도장이 이뤄졌거나 도장 후 내부가 완벽히 마르지 않은 상태에서 조립이 이루어 진 것이 아닌가 싶은데, 어쨋든 렌치 헤드가 갈리는 것을 방지하기 위해 일식집에서 몇 년 일하며 매일 칼을 갈던 솜씨로 육각렌치의 날을 세웠다.
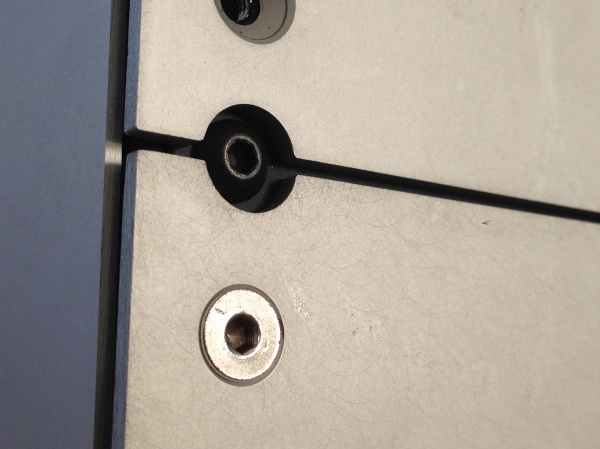

Even though the allen key was sharp as a blade I failed to unscrew the black bolts on the left. I used kinda stubby needle nose pliers and I couldn’t get to the front left bolt. I could’ve stuck the pliers inside the structure but it was too risky since I didn’t have a good grip and if I drop the plier onto the mirror.. don’t even wanna think about it.
렌치 날이 과장 좀 보태서 거의 칼날이었는데도 좌측 볼트는 분리가 불가능했다. 제대로 된 렌치가 없어 그냥 니들노즈(롱노우즈)로 너트를 조정했는데 다른 부분은 다 괜찮았지만 왼쪽 앞부분은 도저히 닿을 수가 없었다. 손을 안쪽으로 넣어서 조일 수도 있었겠지만 그립이 제대로 나오지 않았고 또 만약 조이는 와중에 도구를 떨어뜨리기라도 한다면 아래에 있는 거울에 문제가 생길 수도 있기 때문에 그렇게 하진 않았다.

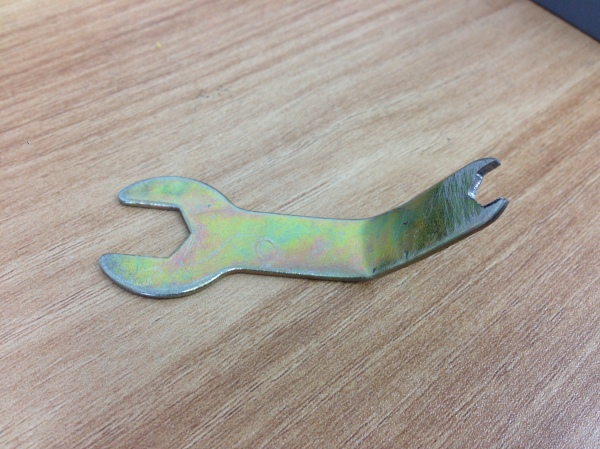
Here enters the makeshift wrench made from a free larger wrench for IKEA style furniture. It worked perfect without risking anything.
예전에 책상 조립하고 남은 렌치의 반대쪽을 이용해 작은 렌치를 만들었다. 안쪽으로 손이 들어가지 않고도 수월하게 조정이 가능했다.
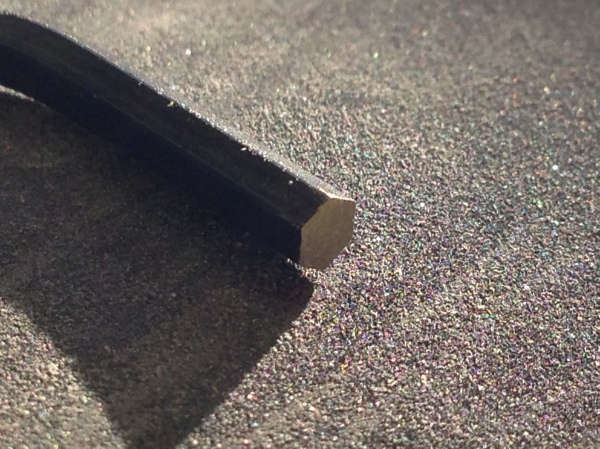
Below is the test run after leveling attempt. I always thought the laser would be purple(405nm in wavelength) but it’s pretty blue.
아래는 레벨링 후 테스트 프린트. 레이저가 자외선이라(405나노미터) 보라색일 줄 알았는데 완전 파랑이네.
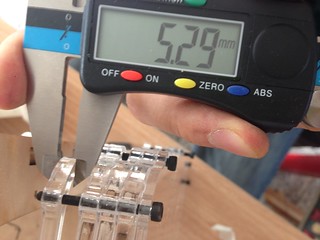
Colorfabb Bronzefill
Ordered 1.5kg (3.3 lbs.. approx.) last Tuesday, got it this Monday. Shipping of 30 Euros well spent, although it was the only shipping option available.
Brief review: it prints well, easy to print but print slower than normal, around 40mm/s. They claim bronze powder content is up to 80%. Anyway it’s got the heft of … definitely not metal but more like ceramic or brick. The reason I feel it is more like ceramic or brick is not only the color but when it is printed it’s brittle and sharp edges easily chips away. On the bright side, sanding is much easier than regular PLA.
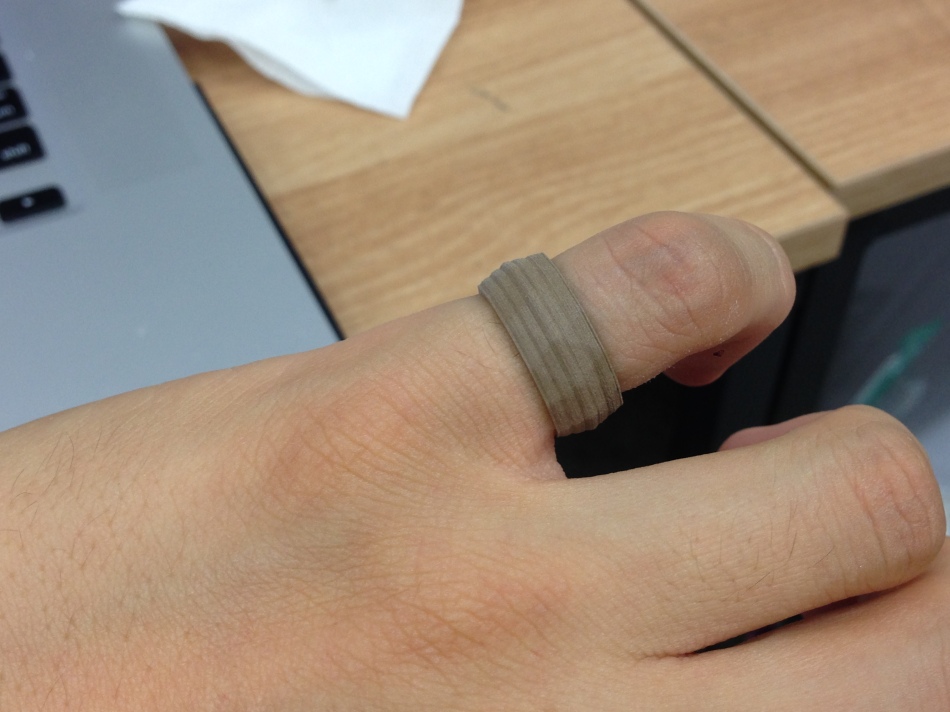
Tried to torch a simple geometric ring hoping remainder will be purely metal after burning away PLA but the ring didn’t hold itself and collapsed. It got crispy too.
지난주 화요일에 주문한 청동 필라멘트 이번주 월요일에 도착. DHL 배송비 대략 50000원 지불한 가치가 있구만.
간단히 리뷰 하자면 이 필라멘트는 청동분말이 80%까지 함유되어 있다고 제조사는 얘기하고 있다. 프린트는 잘 되는 편이며 인터넷상에서는 빨리 출력시 필라멘트가 갈리는 현상이 있으니 천천히 하라고 해서 40mm/s로 출력. 출력하고 나니 덩어리가 있는 모델은 상당히 묵직한데, 미묘하게 금속의 묵직함은 아니고 도기나 벽돌같은 느낌의 묵직함. 벽돌느낌이 강하게 나는게 잘 깨지고 부러지는등 인장과 압축강도가 낮은듯 하지만 대신 사포질은 매우 용이하다.
청동분말이 들어있다길래 토치로 지져봤는데 필라멘트는 구리같은 금속이 남았고 반지는 무너져서 감자칩과 같은 바삭바삭함.


Round table and making sessions in coming week
2014년 9월 17일 7시에 “디스코-텍” (Disco-Tech / 영등포 문래3가 58-20 3층, 문래역 7번 출구 5분 문래공원 사거리 1층 금강 이엔씨) 에서 “3D 프린터의 (불)가능성의 좌표 그리고 이면을 둘러싼 생각들”이라는 주제의 세미나와 뒤이은 주의 제작워크샵을 진행합니다. 자세한 내용은 Unmake Lab 에서.
I am invited to a round table on the topic : “(im)possibilities of 3D Printing and the concepts surrounding the second order of magnitude”. On the following week, I’ll be giving a 3-day making class. More info here : Unmake Lab
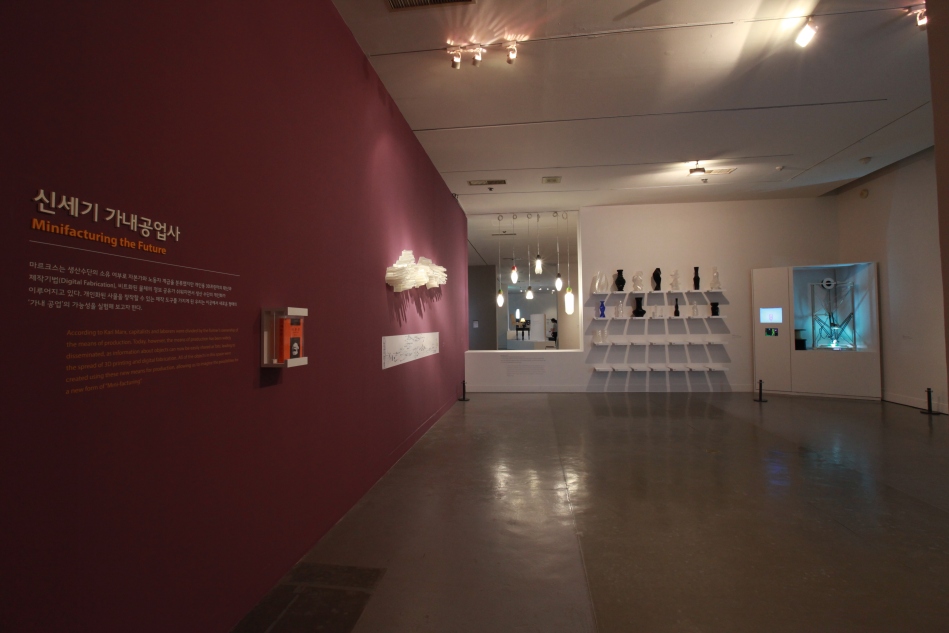
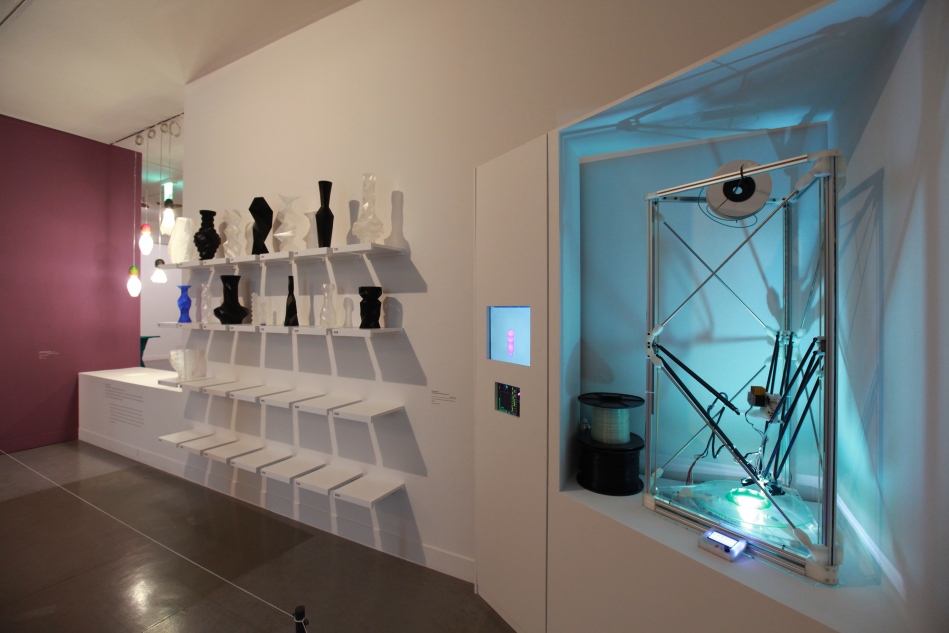
“Objectology” exhibition at the national Museum of Modern and Contemporary Art, Korea
그동안 작업하던 몇 작품들이 지난 6월 5일부터 국립현대미술관 과천관 제3전시실(디자인상설전시관)에서 “사물학” 타이틀로 진행되고 있습니다. 알고리드믹 모델링을 통한 조형과 3d 프린터를 비로한 디지털 제조장비를 이용하여 직접 제작한 작품과 제품들이 2015년 1월초까지 8개월간 전시됩니다.
Pieces I have been working on for the last several months, if not years, are being exhibited at the National Museum of Modern and Contemporary Art of Korea from 5th of June till the January of 2015. Works exhibited are mostly made with Grasshopper for Rhino, and fabricated with custom built large format delta 3d printer. Interactive vase designer is also made with Grasshopper and the interface is made with TOUCHosc.
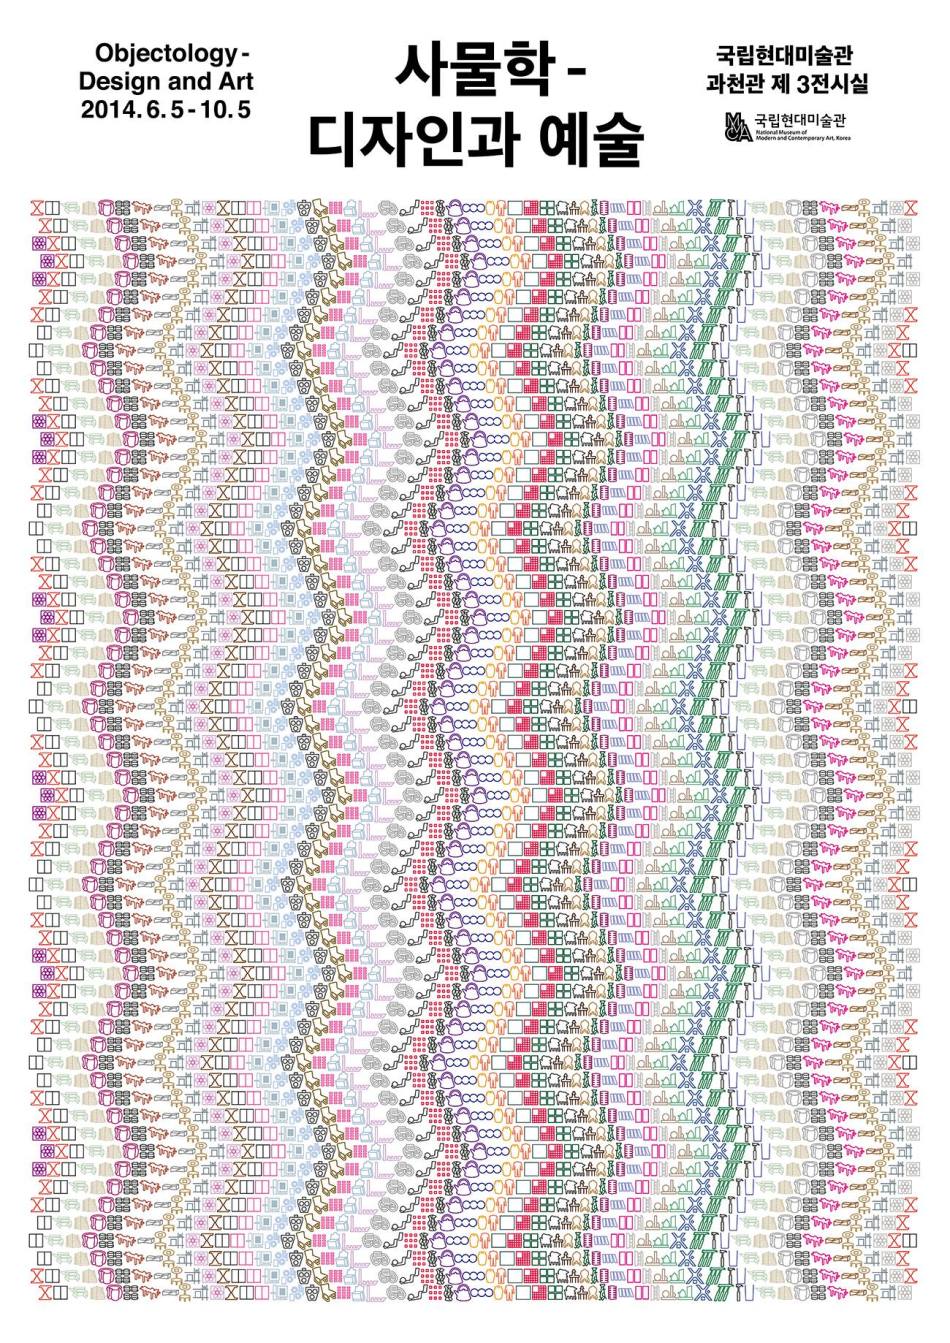


공식 전시 소개는 이곳에서…
http://artmu.mmca.go.kr/user/sub/subView.do?contentsNo=336&magazine=201406&menu=MMCA
Getting ready for the next week’s exhibition
Here are some photos of the works in progress.
다음주부터 시작하는 전시를 위한 작업 진행중입니다.


Spring cleaning
Since last november large format delta 3d printer was operational, not without any problems but this morning for the first time, heater stopped working. I took the effector apart but couldn’t really figure out what was wrong so I decided to replace the heater unit.

My nozzle has some leakage problem from bent nozzle from being forcefully smashed and shattering glass build platform last year and carbonized PLA gunk stuck good inbetween the heater unit and the brass block. I tried to bore off the heater unit with HSS drill bits but it was ridiculously hard and drilling was not an option.

I disassembled the hotend and heated up the brass block with a small torch then was able to push out the heater unit. After cleaning I lightly sanded off remaining stain and it is now (almost) as good as new!

작년11월에 대형 델타 프린터를 만든 이후에 생긴 문제들을 여러차레 손보아 신뢰도가 많이 높아진 상태였다. 추측컨데 지난 두달 반동안 거의 매일 하루종일 프린터를 돌린게 무리가 아니었나 싶은데, 오늘 아침 처음으로 히터가 작동을 멈췄다. 멀티미터로 쳌해보니 단선도 아니고.. 이유를 모르겠어서 하나 더 가지고 있는 히터유닛으로 교체하기로 결정, 에펙터부분 전부 해체.
작년에 대형 필라멘트 스풀이 위에서 떨어지는 바람에 달궈진 노즐이 유리를 작살낸 적이 있었는데, 그 이후로 노즐이 한쪽으로 휘어져 휜 반대쪽 틈으로 녹은 플라스틱이 흘러나오는 문제가 생겼다. 녹은 플라스틱이 탄화되어 히터유닛과 히팅블럭 사이에 견고하게 굳어져 빠지지 않는 바람에 드릴프레스로 보링작업을 하려 했으나 말도안되게 단단해서 망가지기 전에 일찌감치 포기.. 그냥 대용량 저항처럼 생겨서 얕잡아본 것 같다.
핫엔드 전부 해체 후 소형 토치로 히팅블럭을 달궈 힘겹게 빼낸 후 클리닝. 면에 남아있는 찌꺼기 가볍게 샌딩하니 새것같… 지는 않지만 상태가 좋아진건 사실.

Remote 3d printing with octoprint(octopi)
During the exhibition starting from June for 4 months, I will be visiting the US for a month or two, and the large delta printer has to run every weekend or so. I can (and certainly will) teach someone at the museum to operate and troubleshoot at basic level but I wanted to try the viability of remotely 3d printing from the other side of the planet. I think it’ll be the first ever real-time 3d printing from the farthest away. I hope there’s not too bad latency..
Below is the first run within the same network(but routed twice).
6월부터 네 달 동안 진행되는 국립현대미술관 전시중 약 1-2개월정도를 미국에 방문하게 되었다. 그 중에도 대형 델타프린터는 주말마다 가동이 되어야 하기 때문에 기본적인 작동법이라던지 문제해결에 대해 상주하는 직원에게 교육이 필요하다.
하지만 직원 교육 외에도 내가 원격으로 프린터를 조종하고 모니터링을 할 수 있다면 여러모로 안심이 된달까, 그리고 지구 반대편에서 실시간으로 3d 프린팅을 하는 가능성을 테스트 해보고 싶기도 하다. 아마 가장 먼 곳에서 실시간으로 3d 프린팅을 하는 최초의 기록이 될 듯. 레이턴시가 너무 크지 않았으면..
My work has been featured

On “Art Museum” by Art Museum Association of Korea.
한국사립미술관협회에 제 작업이 소개되었습니다.

Ultimaker Heated Chamber

I’ve wanting to build heated chamber from last year, since I installed dual extruder and heated bed mod for printing ABS and PLA dissolvable support. Dissolvable support is crucial for outputting quality prints on par with commercial FDM machines which handle massive overhangs relatively well.

Laser cut and stacked.
X-Y steppers are already moved to the outside and they stay cool. Stacked set-offs fit well. The only problem is acrylic sheets vary in thickness from point to point even within a single sheet. I used 5mm acrylic sheet for set offs but the thickness differ around 5% so I used washers to compensate the distance and reduce tensions caused by nearby tightened nearby bolts. I drilled several holes on the chassis to mount everything. Hinges were also printed.

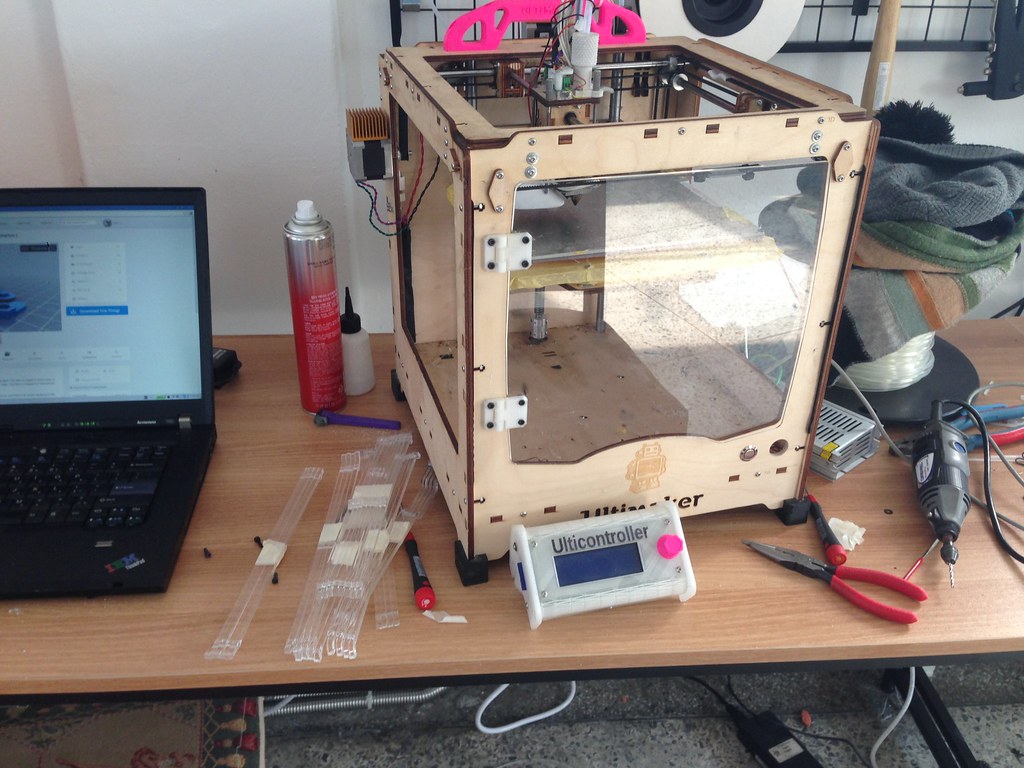
Top cover has opening and lock(black part) for cables to stay in place. I used flexible PLA for flaps, which prevent heat from escaping.


With 120W power supply it heats up to 70″C in 8-9 minutes in winter. It started from fairly cold temperature(12’C) so in most cases it should be around 7. But it still takes longer than 30 minutes to reach over 90″C, it requires larger power supply but I think I will keep it this way since current power supply is pretty slim and fits nicely underside, makes it invisible.


All drawings are posted here
New Exhibition in Seoul
I will be exhibiting my work at Artcenter Nabi for a month or two. Opening at 6pm on the 5th of March, 2014. My work will include Grasshopper3d with TouchOSC to design via pre-determined but not definitive object then produced in situ using form1 and large format delta arm 3d printer(VLDP) my team has built last year.
아트센터 나비에서 한두달간 작품전시 합니다. 2014년 3월 5일 6시 SK 본사 사옥 4층 아트센터 나비에서 오프닝. 이번 전시는 그래스호퍼로 만들어진 알고리듬을 통해 TouchOSC(아이패드에서 조작)로 사용자가 제품을 직접 디자인하고 동일한 공간에서 짧은 시간 안에 단일제조를 통해 제조업의 패러다임이 바뀜에 따라 변(해야)하는 디자이너의 역할을 보여주고자 했습니다. 만들어진 디자인은 작년에 저희 팀이 직접 제작한 대형 델타 프린터(VLDP)와 form1으로 출력됩니다.

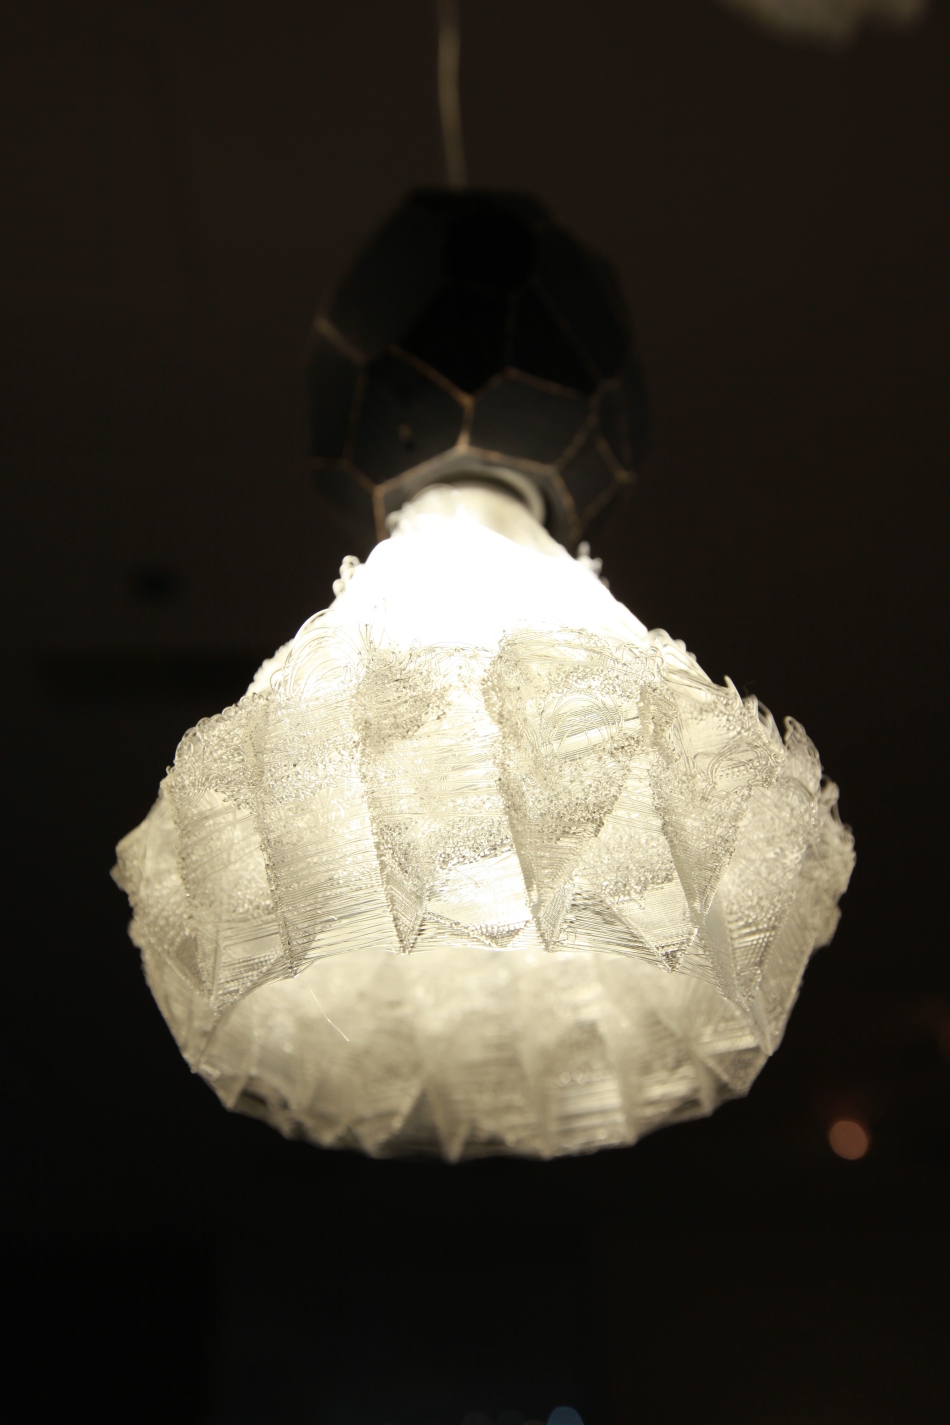
VLDP overnight printing time lapse and playing
Last year my team and I made a large format delta arm robot – VLDP(Very Large Delta Printer) and have been wanting to publish, so here it is.
This print has a percussive quality to it owing to its large volume, having deep ringing bass
which could not be captured with IPhone internal mic. It’s about 450mm tall and took 8-9 hours to print this single walled vase.
작년에 전시를 위해 제작했던 대형 델타 프린터에 대해 여지껏 변변한 다큐먼트를 못하고 있었는데 더이상 까먹기 전에 해야 할 것 같아 슬슬 시작하는 중이다. 밤새 출력한 형상의 타임랩스와 연주 영상인데, 출력물의 크기가 워낙 크다보니 마치 드럼처럼 연주가 가능하다. 매우 깊은 울림의 베이스음역이 있는데 아이폰으로 촬영하다보니 아무래도 실제로 듣는 소리처럼 녹음이 되진 않았지만 맛보기엔 충분한 듯.
450mm정도의 높이이고 약 8-9시간정도 걸림.
Credit where it’s due:
Source file : http://www.thingiverse.com/thing:157102
Music : Gene Harris – Losalamitoslatinfunklovesong
Last year recap #1
I’ve been busy and haven’t been able to post for a couple of months but before I forget, I need to document things happened. This is what I was involved in a collaboration with a Korean fashion brand called “What I Want”, local studio and manufacturer of ladies’ shoes and accessories.
When I first visited their shop to get some ideas, I failed to 3d scan on site due to improper lighting and interior settings so I took a few of their products with me then proceeded in a more controlled environment. After I decided to first digitalize a few of their high profile products, it worked out pretty well. Once it is “voxelized” it becomes immensely easier to manipulate.
Made a small video of how it’s done. 3D scanning was done with IPhone 5 and 123D catch.
작년 말부터 올초까지 바쁘고 몸도 좋지 않아 두달정도 포스팅을 하지 못했다. 기회가 있어 다큐먼트를 해야하는 상황이라 오래되고 작은 것부터 하기로 했다. 작년 10월부터 11월 말까지 왓아이원트 라는 여성 패션브랜드와 작업을 하고 전시를 했다.
처음 압구정 로데오에 위치한 가게를 방문하고 구두를 스캔하였으나 조명과 주변환경등이 부적합해서 잘 되지 않아 몇 개의 구두를 빌려와 한적한 공간에서 스캔을 진행하였다. 일단 사물을 디지털화 하고 나면 그 뒤의 형태변형및 조작은 매우 편리하게 이루어진다.
최대한 짧게만든 비디오를 보면 대략 어떻게 진행되었는지 알 수 있다. 3D 스캔은 아이폰5와 123D catch를 이용했다.
Design for Life Party
Will also be participating at “Design for Life” party at the Design Museum aA in Hongdae, Seoul, Korea on the Saturday, 16th. Custom built large format delta 3d printer will present at the event.
홍대 디자인뮤지엄 aA에서 16일 토요일에 “Design for Life”에 FAB3 이름으로 참가합니다. 직접 제작한 대형 프린터를 놓고 출력 및 전시를 할 예정.
facebook page :
https://www.facebook.com/designxlife2013

Late night calibration and troubleshooting for forthcoming this weeks events..
Media Future Shock exhibition

I as a group(Fab 3) will be presenting a giant delta arm 3d printer at this exhibition, outputting parametric models based on growth of crystal.
When things go bad..
This is the first time it happened.. An overnight print greets me with a big lump of PLA. I’ve seen this many times on Replicator 2, but not on an Ultimaker.. It took serious wiggle and jiggle to get this huge 3d printed tumor out of its place. Surprisingly it still prints just fine right after removing it.

State of dual extrusion
This week is Korean thanksgiving week with almost paradigm shifting 5 day weekend, (with only 2 days of weekday). Just in timely manner the dual extrusion kit for my Ultimaker has arrived on the last day of weekday, since then I’ve been assembling and calibrating non-stop.
직장인들에게는 큰 축복인 수목금의 추석연휴가 오기 바로 직전 화요일에 네덜란드에서 작업실로 Dual extrusion kit 소포가 도착. 정확히 2주 걸리는구나.. 부모님 뵈러 집떠나면 프린터와 떨어져야 하기 떄문에 이틀간 논스톱으로 조립과 칼리브레이션.

Been using my Ultimaker for couple of years making numerous modifications, one of the most common but immensely useful is the Owen’s Bowden Clamp. I was too excited to add 2nd extruder and neglected there were some changes in hot end design, requiring some parts to be printed out prior to take it apart, especially the dual bowden clamp. It works like a charm!
울티메이커를 2년간 사용하면서 일일히 다 기억을 못 할 정도로 개조를 많이 해 뒀는데, 그 중 가장 유용했던 부분이 Owen’s Bowden Clamp이다. 소포 받고 신나서 듀얼 보우덴 클램프를 먼저 프린트 해 놓지 않고 기계 분해부터 했다가 최소한만 다시 조립해서 프린트하느라 약간 애를 먹음.

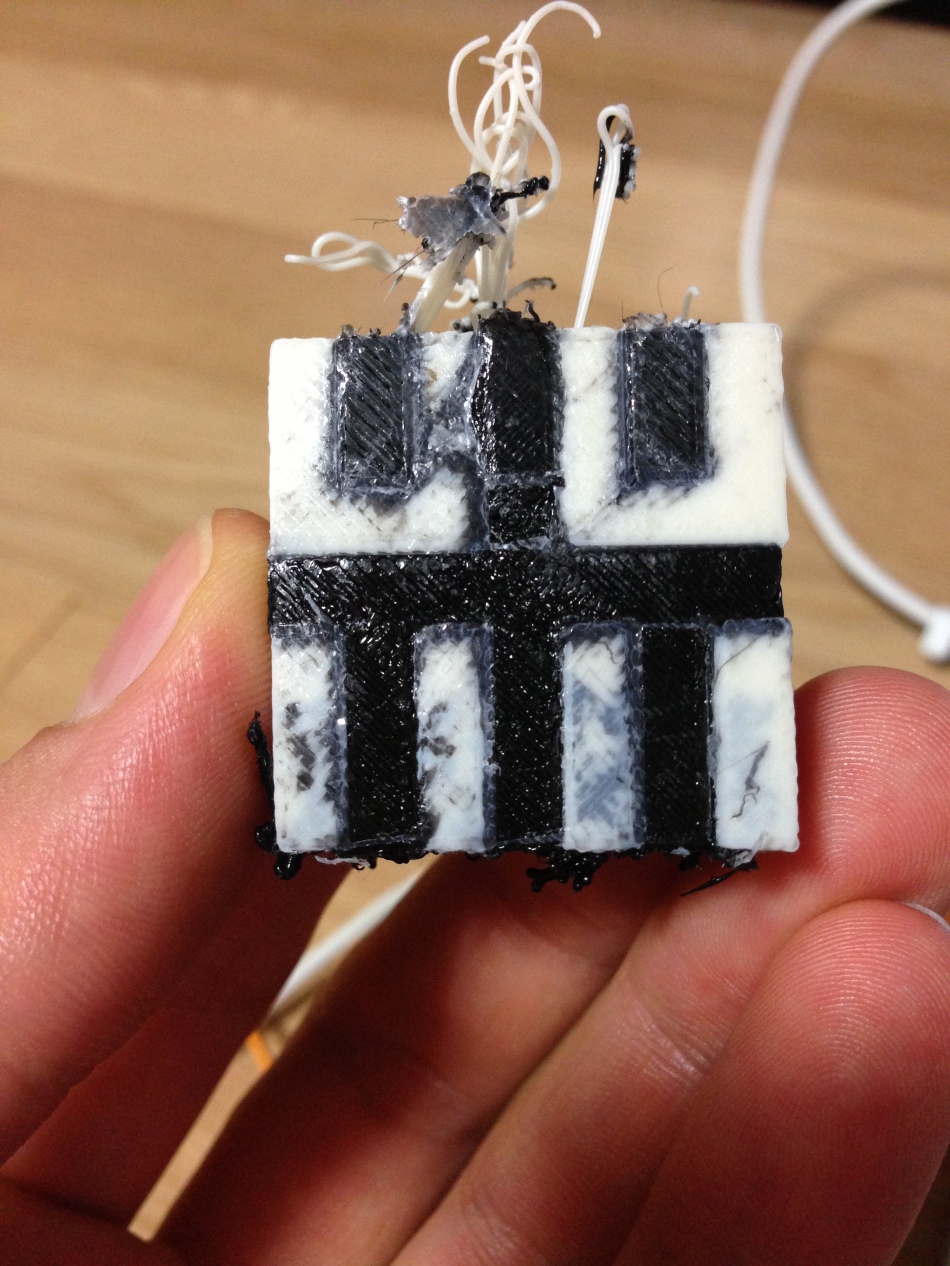
I am using ABS for main model and PLA(black, in this case, to clearly see drizzling for fine tuning..) for dissolvable support so I can use it like a commercial FDMs, tho there are many other modifications to be made in the future. After hours of tedious set up and calibration I was able to make the first dual-material Hilbert cube. It was interrupted about half way through. I also printed out a traffic cone which printed out much better. It has to do with drizzling of PLA and switching back and forth between nozzles for every print with different materials. I assume it’d be much easier to print if I use both for ABS or HIPS for support.
앞으로는 상용FDM처럼 ABS를 주 재료로 사용하고 서포트는 PLA를 사용할 계획인데 현재 프린터가 PLA 전용으로 설계/개조가 되어 있어 앞으로 heated bed나 chamber과 같은 추가적인 개조가 많이 필요하다. 여튼 수시간의 설치와 칼리브레이션 끝에 아직은 매우 지저분 하지만 dual material print를 출력할 수 있게 됐다.